Diablo 4 Druid Build – Howling Tempest (LvL 70+): In this Diablo 4 Druid Build, I’ll show you how to play a LvL 70+ Howling Tempest Druid that’s aimed at World Tier 4. If you’re looking for a Build that combines the Tempest and Howl Storm Builds that I did for World Tier 3, then this Diablo 4 Howling Tempest Druid Build Guide is for you!
Diablo 4 Druid Build – Howling Tempest (LvL 70+)
Both the Tempest and Howl Storm Builds focused on the use of Lightning Storm to deal damage. Now in the Howl Storm Diablo 4 Druid Build, I not only set Poison on enemies in order to gain increased Critical Strike Damage but also to help take damage off of them. Here, we’ve sort of altered away from that in favor of other strategies, but the general concept is the same.

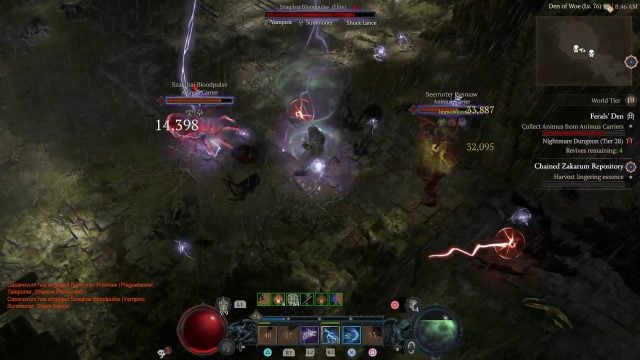
We’re still going to spam Lightning Storm to annihilate everything that’s on the screen, especially since it got buffed in the last Patch 1.0.3. So the duration in which the amount of Lightning Bolts that come out has been increased from 4 to 6 seconds. This gives you a 6-second winder in between casts to get the maximum bolts out. Additionally, on the Primal Lightning Storm upgrade, the Immobilize chance has been raised from 8 to 12%, which is fantastic because you do increased damage to Immobilized targets due to a lot of passive that Lightning Druids have.
Another obviously notable passives is the Perfect Storm Key Passive. This makes is so that storm skills grant one spirit and even deal increased damage against Vulnerable, Immobilized, or slowed enemies. Bad Omen is also another great pick, since on Lucky Hit you have up to a 30% chance to deal even more lightning damage to these crowd-controlled enemies.

The Electric Shock passive will help trigger immobilize whenever you deal lightning damage. If a target is already immobilized when this procs, then it will deal even more damage to that target. Our second Paragon Board, Constricting Tendrils, features a Legendary Node that further gives all Nature Magic skills a chance to entangle enemies in vines, effectively immobilizing them for two seconds and dealing poison damage. Lastly, the Poison Creeper can be activated to manually immobilize and poison enemies. As we’re taking the Packleader Spirit Boon, any critical hits we do will also have a chance to reset any Companion Skill cooldowns, giving us more opportunities to reapply Poison Creeper’s immobilize.
We also make use of Blood Howl and Innate Blood Howl to help manage our Life and Spirit resources. You can potentially enhance this ability by making use of the Nighthowler’s Aspect which we will discuss later on. Last is Debilitating Roar, which we only make use of in conjunction with the Aspect of the Dark Howl which immobilizes poisoned enemies.
Diablo 4 Druid Build – Howling Tempest (LvL 70+)
Once you hit Tier IV you’ll want to start thinking about min/maxing to get the most out of your Build, and that starts with Skills. Thanks to Paragon Boards and to the increased Equipment affixes, you’ll be able to bypass most of the restrictions you previously faced while leveling up. I also won’t get too deep into Skills, as you most probably know how they work by now.

| LEVEL 70+ DRUID SKILLS | |
| Skill | Points Spent |
| Wind Shear | 1 |
| Enhanced Wind Shear | 1 |
| Wild Wind Shear | 1 |
| Lightning Storm | 5 |
| Enhanced Lightning Storm | 1 |
| Primal Lightning Storm | 1 |
| Debilitating Roar | 1 |
| Enhanced Debilitating Roar | 1 |
| Preserving Debilitating Roar | 1 |
| Blood Howl | 5 |
| Enhanced Blood Howl | 1 |
| Innate Blood Howl | 1 |
| Ancestral Fortitude | 2 |
| Vigilance | 3 |
| Poison Creeper | 5 |
| Enhanced Poison Creeper | 1 |
| Brutal Poison Creeper | 1 |
| Nature’s Reach | 3 |
| Elemental Exposure | 3 |
| Endless Tempest | 3 |
| Bad Omen | 3 |
| Charged Atmosphere | 1 |
| Electric Shock | 3 |
| Neurotoxin | 1 |
| Cataclysm | 1 |
| Prime Cataclysm | 1 |
| Supreme Cataclysm | 1 |
| Defiance | 3 |
| Circle of Life | 3 |
| Natural Disaster | 3 |
| Perfect Storm Key Passive | 1 |
Spirit Boons
- Wariness – Take 10% reduced damage from Elites.
- Packleader – Lucky Hit: Critical Strikes have up to a 20% chance to reset the Cooldowns of your Companion Skills.
- Overload – Lucky Hit: Dealing Lightning damage has up to a 20% chance to cause the target to emit a static discharge, dealing X Lightning damage to surrounding enemies.

Diablo 4 Druid Build: Equipment, Gems, and Aspects
Equipment is the most important part of any Endgame Build, and It’s important to understand that it’s a long-term goal. You won’t have all Paragon Boards available right away, and getting all uniques will probably take a lot of farming, so try to use Legendary Aspects to adjust to your needs while you farm levels and better gear.
Legendary Aspects and Unique Powers
I’ll divide the Equipment into different slots, so it’s easier to understand what you should be using and what affixes you should be looking for. Remember that unique equipment has fixed affixes and powers, so if you are using one, you might need to re-slot a Legendary Aspect into a different piece.
Another important thing to notice is that, when looking for stats, you’ll want to make sure you are fulfilling your Paragon Rare Node requirements. Some rare nodes have very high requirements, and equipment is what allows you to fulfill them. These bonuses often double the rare node effect so, for example, getting an Equipment piece with +100 Dexterity might unlock one or more Node bonuses, giving you a massive bonus as a result.
Helm
Legendary Aspect
Aspect of Disobedience: We take this Aspect to further increase the armor we have to make us much tankier.
Affixes
- Cooldown Reduction
- +Ranks of Poison Creeper
- +Maximum Life
- +Total Armor
Chest Armor
Legendary Aspect
Aspect of Shared Misery: This makes it so when you crowd control an enemy, you have up to a 50% Lucky Hit chance to spread the debuff to another enemy that’s unaffected by crowd control. Essentially, this will mean that you immobilize more enemies, which increases your damage against them and increases your resource gain.
Affixes
- +Intelligence
- Damage Reduction from Distant Enemies
- +Ranks of Blood Howl
- Damage Reduction from Enemies That Are Poisoned
Gloves
Legendary Aspect
Runework’s Conduit Aspect: This makes it so that critical strikes with Storm Skills make the air around you charged up, which casts damaging lightning bolts periodically. Just like the Lightning Dancer’s Aspect below, you’ll want to keep upgrading this Aspect for its damage. The duration on it isn’t super important, because you can keep extending it with Critical Strikes. Because Lightning Storm hits so many enemies, and because of our high Critical Strike Chance, you’re going to be able to keep extending this indefinitely.
– OR –
Nighthowler’s Aspect: This is an alternative aspect that we can use if you don’t want to equip the Runework’s Conduit. It makes Blood Howl increase Critical Strike Chance in addition to its effects. The skill also affects nearby Companions and Players.
Affixes
- Lucky Hit: Up to a 5% Chance to Heal X Life
- +Attack Speed
- Storm Skill Cooldown Reduction
- +Critical Strike Chance
Pants
Legendary Aspect
Protecting Aspect: This summons a bubble whenever you get hit when not Healthy once every 90 seconds. This is great because you get to stand inside that bubble, take no damage and can freely cast spells. You don’t need to worry about anything such as dodging hazards.
Affixes
- +Dodge Chance Against Close Enemies
- +Total Armor
- +Maximum Life
- Damage Reduction from Close Enemies
Boots
Legendary Aspect
Aspect of the Dark Howl: This converts Debilitating Roar into a Werewolf Skill and gives it a secondary effect that immobilizes poisoned enemies for up to four seconds. The aspect is great because of Poison Creeper. Once that skill’s immobilization wears off, you can retrigger another round of immobilize with Debilitating Roar.
Affixes
- +Dodge Chance
- Spirit Cost Reduction
- +Dexterity
- +Lightning Resistance
Two-Handed Weapon
Legendary Aspect
Lightning Dancer’s Aspect: This the most important Legendary Aspect of the build, and should be placed on a Two Handed Weapon, specifically a Staff which adds damage to crowd controlled enemies, to maximize its effect. This makes it so that any Critical Strikes from Lightning Storm will spawn 3 smaller dancing bolts that will seek out enemies and deal even more Lightning Damage. However, this is one of those Aspects that you will need to keep upgrading throughout your journey. As your level goes higher, and you pass through Sacred and Ancestral quality aspects, the damage from Lightning Dancer will keep increasing.
Affixes
- +All Stats
- +Vulnerable Damage
- +Core Skill Damage
- +Willpower


Amulet
Legendary Aspect
Accelerating Aspect: This is just a means to further increase your attack speed. Critically Striking with your Core Skill, Lightning Storm, will be extremely reliable. The faster you can cast Lightning Storm, the faster things die, and this will be greatly enhanced with this Aspect’s Attack Speed bonus.
Affixes
- Damage Reduction from Distant Enemies
- +Ranks of the Envenom Passive
- +Damage while in Human Form
- Damage Reduction from Close Enemies
First Ring
Legendary Aspect
Smiting Aspect: Both of the components of this aspect are really important. First, you get increased Critical Strike Chance against enemies below 35% health, making finishing them off much, much easier. The second part of this skill makes it so that you have 40% increased Crowd Control Duration whenever you are Healthy. Doing so will keep enemies Immobilized longer, meaning you damage them more and more.
Affixes
- +Damage to Crowd Controlled Enemies
- +Vulnerable Damage
- +Overpower Damage
- +Critical Strike Chance
Second Ring
Legendary Aspect
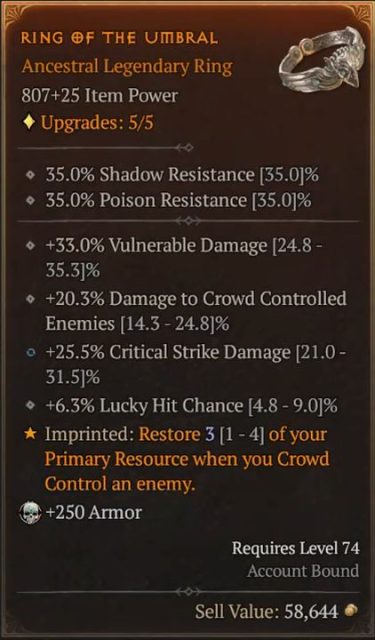
Aspect of the Umbral: This works extremely well with the number of sources of Crowd Control you have at your disposal. Aspect of the Umbral restores a small portion of your Spirit whenever you Immobilize a target, which we will do so regularly, whether via Poison Creeper, or just by dealing Lightning Damage. This is one of the best ways to alleviate the Druid’s Spirit management problems.
Affixes
- +Vulnerable Damage
- +Damage to Crowd Controlled Enemies
- +Critical Strike Damage
- +Lucky Hit Chance
Gems
For gems, you’ll want to slot:
- Weapon: Emeralds to increase Critical Strike Damage against Vulnerable enemies.
- Armor: Topaz to reduce the damage taken when CCed and Rubies to boost your Maximum Life.
- Jewelry: Skulls to boost your Defense value.
Paragon and Glyphs for the Druid Build
When it comes to Paragon Boards, we are mainly going to aim for Rare Nodes that increase our damage output, as well as Glyphs that synergize with our Build. Please note that the order in which I get the Nodes is just a general guideline, and you can adjust it to your current needs.
First Paragon Board – Base
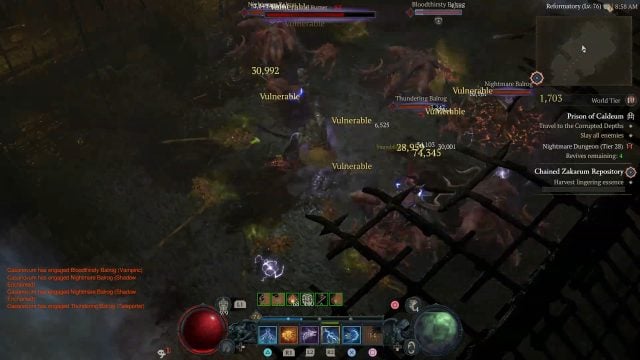
The first Glyph you’ll want to slot on your Base Board here is the Exploit Glyph. This makes it so that whenever you damage enemies, they become Vulnerable for three seconds. It also increases your Vulnerable Damage. Exploit gives a huge boost to this build’s damage, because Lightning Storm constantly makes things on the entire screen Vulnerable.

Second Paragon Board – Constricting Tendrils
For your Second Paragon Board, you’re going to take Constricting Tendrils as mentioned earlier. This makes it so that all of your Nature Magic Skills have a chance to immobilize targets and poison them as well. Since we’re also using the Envenom passive, all Critical Strike Damage against poisoned enemies will be greatly enhanced.

The Glyph we’ll be placing here is Spirit, which further boosts the Critical Strike Damage of our Core Skill, Lightning Storm. Its secondary effect also gives Critical Strikes a ramping debuff that makes enemies take up to 12% increased damage from us for 20 seconds.
Last on the Second Board are two really good rare nodes. You will want to get Devastation and Nature’s Will as soon as possible as both drastically increase our Nature Magic Skill Damage. Devastation, in particular, also increases our Damage to Elites.
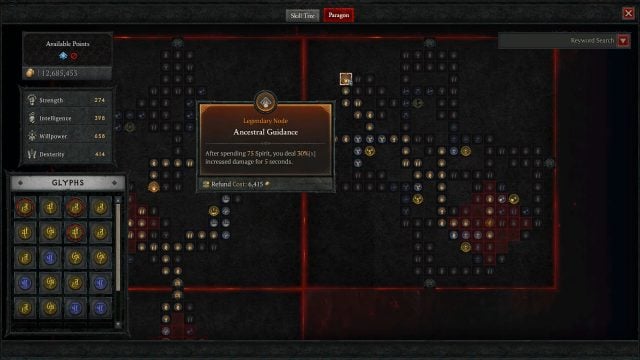
Third Paragon Board – Ancestral Guidance
So then you’ll move on to Ancestral Guidance for our third Paragon Board. The Legendary Node on this board makes it so that after spending 75 Spirit, you deal 30% increased damage for 5 seconds. While the Node by itself is already extremely powerful, we are actually after the rare Reclamation node and the magic nodes around it. Reclamation and the nodes directly around it increase your Maximum Spirit and also grant you Spirit on Kill. These two are huge for this build, as they really help you generate a lot of Spirit. I would even go as far as recommend that you take Ancestral Guidance for your second Paragon Board in case you don’t have enough points to get to these nodes.

The next Glyph we’re using is Human. This increases the damage you do while in Human form, but also decreases the damage you take while in this form. While you do change into a Werewolf briefly to use two skills, you immediately shift back to Human form to cast your Lightning Storm.
Final Tips
This build absolutely destroys. It is extremely strong and satisfying, particularly when there are lots of enemies on the screen and there’s lightning bolts going everywhere. It is tons and tons of fun to play, and for those of you that would look great looking for an upgrade to The Tempest build, here you go.

Be sure to check out our Diablo 4 Wiki for any other questions you have about the game and the Builds page if you are looking for more Diablo IV Builds, as well as our Ultimate Beginner Guide and All Classes Overview if you are looking for more Diablo 4 content!


Log in to leave a Comment