With the release of the Pillars of Eternity 2: Deadfire, we’ve gotten some hands on time with the game, especially with Character Creation and Class Building. Obsidian has really outdone themselves with the possibilities, and I can’t think of another game to date that has the extensiveness of customization that Deadfire has. In this article I want to cover some of the changes from the original PoE, explain how some of the new changes work, as well as give some advice when it comes to Character Builds. Let’s jump in and have a look at this overwhelming facet of the game!
Pillars of Eternity 2: Character Creation
When the game begins you will watch a cutscene and then you’ll have to walk a bit and speak with Berath, then Character Creation will begin, which is similar Pillars of Eternity. You begin by choosing your Gender, which has no immediate effect on your character’s Attributes, but does have implications in terms of romance and dialogues. Then you move on to choosing your Race. Before I get into Races, however, I want to talk briefly about Attributes and what they do, so that moving forward you’ll have a better understanding of how to Build a good character from each Class.

Attributes & What They Do
Attributes and their distribution are more important than ever in Pillars of Eternity 2: Deadfire because players have options they’ve never had before because they can “Multiclass“. Let’s take a look at (or refresh if you’re a returning player) just what these Attributes affect so we can get a better sense of how to choose a Race when making a Character.
 Might – Increases Damage and Healing as well as Fortitude. Might is a great Attribute for nearly any class because it boosts nearly all forms of Damage and healing. Whether you’re a Wizard or Fighter it doesn’t matter, you’ll need some if you wish to deal decent damage. Something you maybe didn’t know about Might is that it increases the Damage after every other calculation has been completed, therefore making it the most effective percentage boost you will get. Helwalker Monks can obtain the highest Might in the game.
 Constitution – Increases Health and Fortitude. This Attribute is good for anyone, but especially front lines types, because they will get Hit more often. This has changed slightly from the first game, because it no longer increases Endurance, as there is no longer Endurance in the game. Many passive abilities in the game give you a bonus when you are Hurt, Bloodied or Near Death and this Attribute helps allow those conditions without you being as close to death.
 Dexterity – Increase the characters Action Speed in combat and Reflex. Action Speed not only affects Attack Time, and Reload Time, but also Recovery Time and Cast Time. Because this calculation is done by percentage, it is more effective on characters that have long Cast Times, Reload Times or Recovery Times than it is on ones who don’t. These will primarily be spell casters and those who utilize Firearms.
 Perception – Increases Accuracy and Reflex and also allows characters to spot Traps an secrets. By increasing your Accuracy you not only increase your chance to Hit, but also your chance to Crit, making it effective at increasing your damage. This Attribute is particularly important for casters because they don’t gain bonus Accuracy to their spells from their Weapon or from playing One-Handed. Perception no longer grants a bonus to Interrupt like it did in the first game, because Interrupts are handled differently.
 Intellect – Increases Duration and size of Area of Effect Abilities as well as Will. Also increases your logic and deduction of puzzles. This Attribute affects many Active Abilities in the game and is useful to just about every class. Because it’s calculate by a percentage, it will work better for Durations and AoEs that are already long or large, so take that into consideration when deciding how much you want to invest.
 Resolve – Increases Will and Deflection as well as decreases Hostile Duration. The -% Hostile Duration and Will are much stronger than the Deflection bonus, and will serve those who are on the front lines in good stead. You won’t need this Attribute if you aren’t being Hit often. No longer adds a bonus to Concentration, because Concentration is now handled differently in game, and certain abilities actually give you Concentration.
Races
Just like Pillars of Eternity, you can select from the exact same Races and Subraces, which have nearly exactly the same bonuses as they did in the first game. If you know what you liked to use in the PoE then you can play that again in the second game in most cases without any changes. That makes things really easy for returning players who may not have played in awhile, as even the descriptions of the Subraces remain the same. The differences here are purely cosmetic, as the game has gotten a bit of a face lift in this area (pardon the pun).
Bonus: +2 Might
Subraces: Coastal Aumaua & Island Aumaua
Coastal Aumaua have a natural resistance to Might Afflictions, which are Stunned, Dazed and Staggered. Resistances doesn’t mean they are immune, it means they downgrade the effect by one tier. Stunned > Dazed, Dazed > Staggered, Staggered > None. This effectively means they cannot be Stunned, because Stuns will always be downgraded to Dazed.
Island Aumaua are immune to movement impediments like water, mud and deep sand while in combat. This is useful for some areas of the game where the landscape impacts the tactics of a given fight.
Bonus: +1 Dexterity, +1 Perception
Pale Elves gain +4 Burn and Freeze Armor, making them particularly defiant in the face of casters who deal these types of damage. Depending on your Armor type, this can help to fill in some of the weaker gaps.
Wood Elves, have a natural resistance to Dexterity Afflictions, which are Paralyzed, Immobilized, and Hobbled. Their resistance works just like the Coastal Aumaua’s does, by reducing the tier of the Affliction by 1. Paralyzed > Immobilized, Immobilized > Hobbled, Hobbled > None. This means they cannot be Paralyzed, because this effect will always be downgraded to Immobilized.
Bonus: +1 Dexterity, +1 Intellect
Subraces: Death Godlike, Fire Godlike, Moon Godlike & Nature Godlike
Death Godlike gain +20% Damage against Near Death targets (under 25% Health) as well as +3 to all Power Levels when Near Death. This is just an all around great Subclass.
Fire Godlike gain +2 Burn Armor as well as +1 Armor when Near Death and return Burn Damage to attackers with Melee Weapons. This Subclass is a great choice for a tank.
Moon Godlike heal in a small AoE around them the first time they are Hurt, Bloodied or Near Death in combat. This is 3 separate heals, one at each threshold. If an attack would break 2 thresholds at once you will get both heals.
Nature Godlike gain +2 Power Level while under the effects of Might, Dexterity or Intellect Inspiration. Many abilities give these Inspirations so this is a great choice for any Build.
Bonus: +2 Might, +1 Constitution, -1 Dexterity
Subraces: Boreal Dwarf & Mountain Dwarf
Boreal Dwarfs convert 50% of Misses to Grazes against both Wilder and Beasts. This essentially means they will always deal some damage against these types of enemies, and when paired with abilities like Disciplined Barrage, they will almost always Hit them when attacking.
Mountain Dwarfs have a natural resistance to Constitution Afflictions which are Enfeebled, Weakened and Sickened. Their resistance works just like Coastal Aumaua and Wood Elves. This means Enfeebled > Weakened, Weakened > Enfeebled, and Enfeebled > None. This means they can never be Enfeebled.
Subraces: Meadow Folk, Ocean Folk & Savanna Folk
All 3 Subraces share the the same ability which is Fighting Spirit. Fighting Spirit grants +7 Accuracy and +15% Damage when Bloodied or Near Death. This is another all around good passive for just about any Build.
Bonus: -1 Might, +2 Perception, +1 Resolve
Subraces: Hearth Orlan & Wild Orlan
Wild Orlan have a natural resistance to Resolve Afflictions which are Terrified, Frightened and Shaken. This resistance works the same way as the other Subraces who have resistances. Terrified > Frightened, Frightened > Shaken, Shaken > None. Wild Orlan can never be Terrified.
Hearth Orlan gain a 10% chance for some of their Hits to become Crits. This is an excellent Subclass for Builds that rely upon Crit Damage like Assassin, or Berserker.
Choosing A Class, and Multiclassing
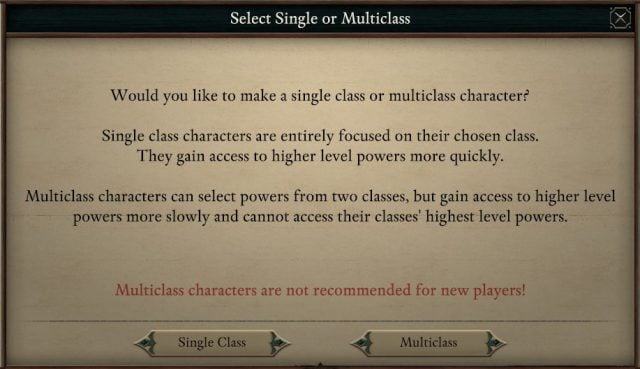
Once you’ve selected your Race, you’ll move on to the Class selection portion of Character Creation. This is the most challenging and complicated part and has changed quite slightly from the original PoE. Immediately upon starting you’ll be asked to choose a “Single Class” or “Multiclass”. This is a huge decision because you’re effectively deciding here to be the most powerful let’s say “Druid” or if you’d rather be a hybrid Class that isn’t as powerful at being a Druid, but can do other things like be a Wizard or a Fighter. This one aspect changes things immensely and adds vastly more time to making a decision. If you have questions about how exactly Multiclassing works, please see my Guide for all the details.
Each Class has Subclasses that not only confer unique bonuses and penalties, but can also change the starting Abilities the characters can pick from. For example choosing the Assassin Subclass of Rogue will increase the Critical Hit Damage, Accuracy and Penetration of all attacks from Stealth, at the cost of receiving more damage from all sources. I have gone over all of these extensively in my other Guides, so will give more of a general overview here.
Subclasses: Berserker | Corpse-Eater | Mage Slayer
Roles: Crowd Control & Defender
Power Source: ![]() Rage
Rage
Barbarians are melee warriors that have a special passive called Carnage that does a portion of their Weapon Damage in an AoE around their target. This makes them particularly good at dealing with groups of enemies. Barbarians deal more damage when Bloodied or Near Death, and favor pure damage over defense.

Berserkers become Confused when using Frenzy in exchange for more Penetration, more Armor and an increased chance that Hits will become Crits with melee attacks. They also take Raw Damage over time and cannot see their own Health. This is a high risk high reward version of the Barbarian and takes more management than the other Subclasses.
Corpse-Eaters can eat corpses while in combat to gain Health and replenish Rage. In exchange their Rage costs are increased by +1, which is significant. This Subclass is recommended for players more familiar with the Barbarian class, and the game’s mechanics.
Mage Slayers gain passive spell resistance and can Interrupt casters with attacks. The downside is that they cannot use Potions or Scrolls and all friendly Durations on them are 50% shorter, which includes Frenzy. This Subclass can really help deal with casters, just be careful how you Multiclass it or you may regret your decision.
 Chanter
Subclasses: Beckoner | Skald | Troubadour
Roles: Support & Crowd Control
Power Source: ![]() Phrases
Phrases
Chanters passively chant Phrases while in combat that buff friendlies or debuff or damage enemies, and they can also cast spells once they have chanted enough Phrases. They have some of the best Summon spells in the game, and are great at supporting their group. Because they can keep chanting, they can keep casting spells over the course of the fight, without running out of resources.

Beckoner’s Summons spells cost one less Phrase to cast, and they double the number of units they summon with Summon Invocations, at the expense of shorter Duration and less Health. Choose this Subclass if you want to spend most of your time summoning.
Skalds are the melee version of Chanters and gain a Phrase +50% of the time when they Crit with a melee attack (this is on top of the Phrases they gain from chanting). Offensive Invocations cost them one less Phrase to use and all other Invocations cost one more. This works out well because their are many Offensive Invocations that have short Cast Times and short Range.
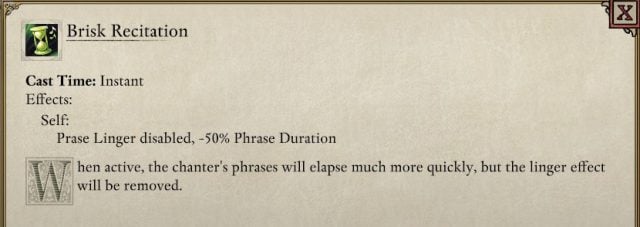
Troubadours’ Linger period is longer than other Chanters, making their Phrases more effective. They can also toggle the ability Brisk Recitation, which allows them to sacrifice their Linger, in exchange for 50% increased chant time. This allows them to build up Phrases faster, and cast Invocations more frequently. Their spells cost +1 Phrases to cast, however.
Subclasses: Ascendant | Beguiler | Soul Blade
Roles: Crowd Control & Striker
Power Source: ![]() Focus
Focus
Ciphers use a blend of magic and weapons to deal with their enemies. They gain Focus each time they strike with a weapon, which then allows them to cast spells, and the more damage they deal the more they build Focus. Ciphers can keep building Focus over the course of a fight, which allows them to keep casting spells without running out of resources (much like the Chanter).
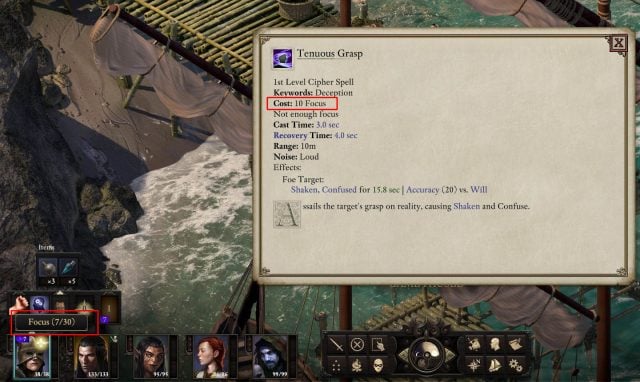
Ascendants begin each fight with more starting Focus, and they have a higher max Focus limit, which means they can cast more easily from the very start of combat than other Subclasses. They take a -1 Power Level penalty until they reach max Focus, at which point they gain +3 Power Levels and all their spells cost nothing for a good chunk of time.
Beguilers excel at crowd controlling and dealing damage to crowd controlled enemies, and much like the Rogue, they gain an increase in damage to Sneak Attack vulnerable targets. Their Deception spells have longer range and can also return Focus, making them the only type of Cipher who can gain Focus from casting some sort of spell.
Soul Blades excel at melee range and gain a special ability called Soul Annihilation. This ability consumes all accumulated Focus into one power Raw Damage attack that must be done at melee range. Soul Blades take a penalty to max Focus, but their Shred spells also cost them less Focus to cast.

Subclasses: Fury | Lifegiver | Shifter | Animist
Roles: Crowd Control, Support & Striker
Power Source: ![]() Nature
Nature
Druids do a mix of different damage types with a heavy focus on nature, and they can Spiritshift into animal once per encounter. Since shifted Druids generally attack at melee range, this makes the Druid sort of a hybrid class. However, they gain Armor and specific weapons when doing so, so they don’t need to worry about managing gear for their shifted form.
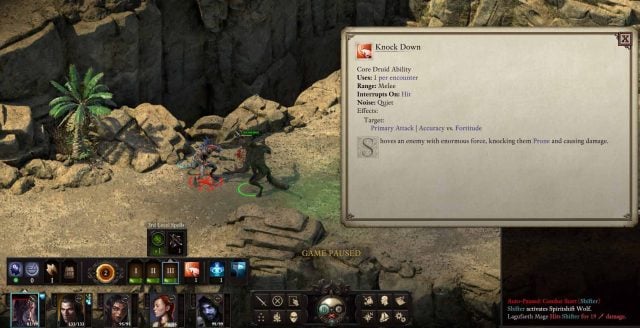
Fury Druids shift into a Storm Blight instead of an animal, which is the only shifted form that has a ranged attack. They gain increased Range and Penetration with Elements spells, and can extend their Duration by killing an enemy, however, they cannot cast Rejuvenation spells. This Subclass is a great choice for Druids who want to be play at range without having to melee.
Lifegiver Druids gain +2 Power Level to their Rejuvenation spells and a further +3 Power Level to them when shifted. However, once their shift ends they take a -5 penalty to Rejuvenation spells. This means they will be more effective healers overall, but will probably not Spiritshift that often due to the severe penalty afterwards.
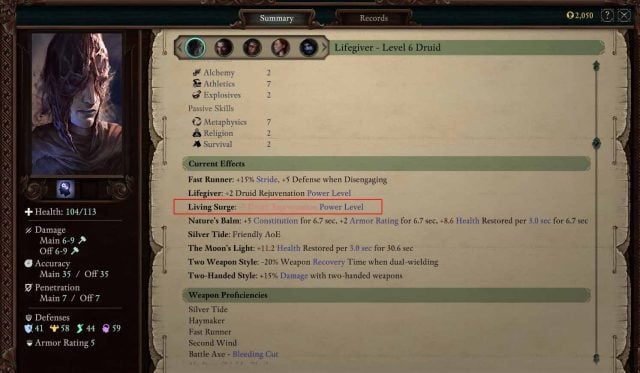
Shifter Druids can shift into each of the 5 Spirit Animals available to the Druid during each encounter, and the Duration of their shifts last twice as long as other Druids. The downside is that they cannot cast spells while shifted, even spells from other Classes. They can however use weapon-based abilities, should they Multiclass.
Animists have no bonuses or penalties and are a great choice for the Druid who wants to shift into an animal once per encounter but don’t want a penalty afterwards, and still want to be able to cast spells while doing so.
Subclasses: Black Jacket | Devoted | Unbroken
Power Source: ![]() Discipline
Discipline
Fighters have a heavy focus on Weapons and are a fairly balanced class when it comes to offensive and defensive capabilities. Fighters possess Stances that give themselves further bonuses, and they can cycle through them as needed, choosing the best one for the situation they are facing.

Black Jackets lose access to Constant Recovery, which typically heals the Fighter for the first 45 seconds of combat. In exchange they gain an additional Weapon Set and an additional Proficiency, and can swap weapons faster than other characters. This allows them to put weapons with long Reload Times in each slot, and cycle through them instead of reloading at the beginning of combat.
Devoted specialize in one particular weapon type, gaining bonus Penetration and Crit Damage with it, and they take an Accuracy penalty when using any other weapon type. However, they still get this bonus when Unarmed or using a Shield, even if they have no Proficiency in that Shield type.
Unbroken Fighters can Engage +1 enemy, gain +1 Armor when using a Shield and gain a huge amount of Penetration on enemies who Disengage from them. This makes them exceptional tanks, with some potential for dealing damage.
Subclasses: Helwalker | Nalpazca | Shattered Pillar
Power Source: ![]() Mortification, Wounds
Mortification, Wounds
Monks prefer Unarmed combat, gaining bonuses to Damage, Penetration and Accuracy for fighting without a weapon. They gain Wounds while in combat, giving them access to a secondary resource they can spend on a subset of abilities. They have some of the fastest attacks in the game, and excel at Interrupting enemies. Note that if you Multiclass with any other class that has Monastic Unarmed Training, it will be replaced with the Monk’s Transcendent Suffering, and you cannot select it.
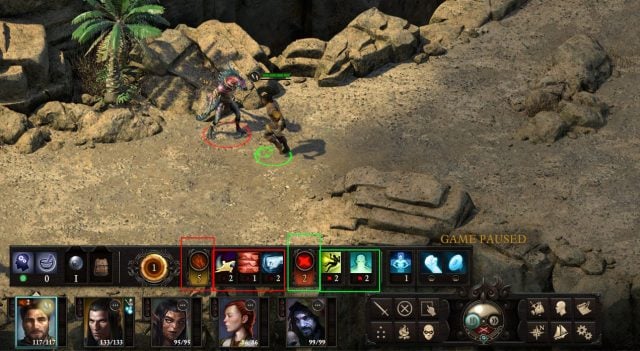
Helwalker Monks gain increased Might each time they gain a wound, and begin combat with one extra Wound, but take +5% increased damage for each Wound they have. This makes Helwalkers some of the deadliest characters in the game, but they must be managed carefully so they don’t die from the extra damage they take.
Nalpazca Monks double the Duration of all Drugs they ingest and also gain a Wound every 3.0 seconds while under the influence of Drugs, and in combat. However, once these Drugs wear off, they will be unable to heal until they rest, which means they will need to rest much more often than other characters.
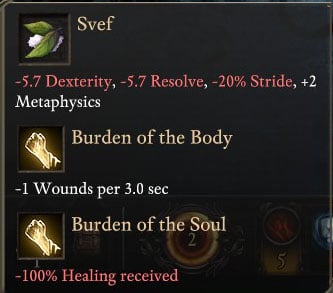
Shattered Pillar Monks gain Wounds when inflicting damage instead of taking it, but the downside is that they must deal twice as much damage to gain them (and they have a max of 5), which is half that of other Monks. This is a good choice if you plan on being Hit less often, but still want to gain Wounds.
Subclasses: Bleak Walkers | Darcozzi Paladini | Goldpact Knights | Kind Wayfarers | The Shieldbearers of St. Elcga
Power Source: ![]() Zeal
Zeal
Paladins are warriors that specialize in defense, healing and Burn Damage. They gain a passive boost to defense from Faith and Conviction, and this changes based on how closely they follow the alignment of their Subclass. Paladins possess powerful Auras that benefit party members around them, and they can switch these at will, much like the Fighter can with Stances.

Bleak Walkers deal increased Corrode Damage with Flames of Devotion and also make the target Sickened. They are the go to choice for DPS Paladins, because no other Subclass increases damage to such an extent.
Darcozzi Paladini are capable of casting a Flame Shield on themself or a friendly party member, which provides Freeze Armor and deals Burn Damage to those that strike the target with melee attacks. Note that the Duration of the Flame Shield lasts much much longer than the Lay on Hands’ heal.
Goldpact Knights gain Armor after casting Sworn Enemy on a target. This Armor lasts until you’ve taken a certain number of hits, but can be reapplied by recasting Sworn Enemy. Consider this one if you need a boost in Armor or plan to play a ranged Paladin.

Kind Wayfarers heal themselves and nearby allies when attacking with Flames of Devotion. The heal is always done around the Paladin, not the enemy struck, and since Flames of Devotion is a Full Attack, if you dual wield you can heal twice.
The Shieldbearers of St. Elcga can Engage 1 additional enemy when equipped with a Shield and can cast a version of Lay on Hands that makes the target unkillable for the Duration. This is a good Subclass for a tank or a support like role.
Subclasses: Berath | Eothas | Magran | Skaen | Wael
Roles: Support
Power Source: ![]() Faith
Faith
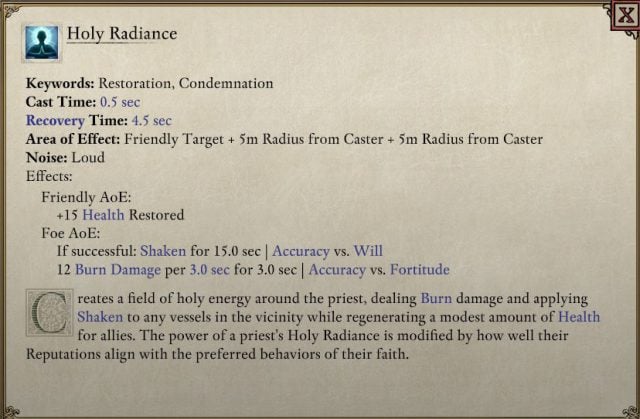
Priests have a wide variety of spells, but focus mainly on healing and buffing their group or debuffing enemies. Priests gain an ability called Holy Radiance which gains/loses potency based on how closely you follow the alignment of your chosen Subclass, much like the Paladin. Each Subclass also possesses its own unique Spiritual Weapon, and gains its own unique set of spells.
Berath Priests follow the God of Death, and gain a handful of Druid spells which follow the main theme of Decay and Corrosion. Their Spiritual Weapon is a Great Sword, and it does +50% Damage dealt as Corrode. Take this Subclass if you wish to have more debuffs and deal more Corrode damage.
Eothas Priests follow the God of Renewal and Light, gaining many spells that heal, protect or revive their party members. Their Spiritual Weapon is a Flail which does +50% Damage dealt as Burn. Take this Subclass if you wish to be more of a support class.
Magran Priests follow the Goddess of War and Fire, and gain many spells that deal Burn Damage. They gain a Pistol and a Sword for their Spiritual Weapon, which do +50% Damage dealt as Burn. Select this Subclass if you want to focus on dealing damage.

Skaen Priests follow the Quiet Slave the God of Hate and Violence. They gain many rogue-like spells that conceal the caster or debuff the enemy. They have a Stilleto and Club for their Spiritual Weapons, both of which deal +50% Damage as Pierce. Select this Subclass if you intend to use Weapons as a main source of damage, and don’t mind Dual Wielding.
Wael Priests follow the God of Dreams, and gain several Illusion spells from the Wizard class. They gain a Rod for their Spiritual Weapon, which does +50% Damage as Shock. Select this Subclass if you wish to focus on Crowd Control and debuffs or wish to fulfill the tank role.
Subclasses: Sharpshooter | Ghost Heart | Stalker
Power Source: ![]() Bond
Bond
Rangers have a heavy focus on ranged combat and come paired with an Animal Companion that can gain its own abilities. Rangers are Bonded with their Companions, and suffer a penalty if it dies in combat.
Sharpshooters hit a bit harder than other Rangers with ranged weapons, but lose Deflection and have slower Recovery Time. If you know you absolutely want to play a ranged Ranger, this is the Subclass for you.
Ghost Heart Rangers have to summon their Animal Companion, and don’t suffer from Bonded Grief if their Companion dies. However, it does cost Bond to do so, and they cannot heal or revive their pet (although they can cast it again). This is a good Subclass for those who don’t want to use the Companion, or worry about gaining Bonded Grief.
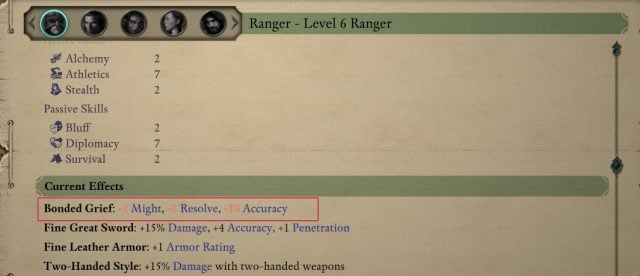
Stalkers gain defense when close to their Animal Companion, and a penalty when away from them. Since Companions all attack in melee range, this puts this type of Ranger in melee range as well. Select this Subclass if you want use a melee ranger, or plan from attacking at close range.
Subclasses: Assassin | Streetfighter | Trickster
Roles: Striker
Power Source: ![]() Guile
Guile
Rogues gain increased damage against enemies that are Flanked or that have an Affliction because of their Sneak Attack passive. They can also do further increased damage by taking the Backstab passive and striking from 2m or less while Stealthed or Invisible, making them excellent at taking targets down quickly.
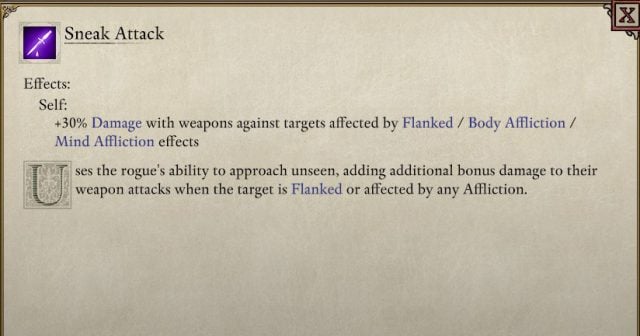
Assassins are the best of the best at killing targets in a single stroke. They gain increased Crit Damage, Accuracy and Penetration, when attacking from Stealth or Invisibility. In exchange they take 15% increased damage.
Streetfighters gain bonuses when Flanked, Bloodied or both Flanked and Bloodied, and this means they will actively seek out many enemies in order to get them. Being Flanked and Bloodied is not hard to do, however, it is considerably harder to survive, so Streetfighters will need some defense.
Tricksters gain several Illusion spells from the Wizard class, but deal much less damage with their Sneak Attack passive. This subclass excels at CCing enemies and boosting their Deflection.
Subclasses: Conjurer | Enchanter | Evoker | Illusionist | Transmuter
Roles: Crowd Control & Striker
Power Source: ![]() Arcane
Arcane
Wizards focus heavily on casting spells, and some deal damage, some debuff or CC enemies and others buff themselves. Wizards can use items called Grimoires that when equipped further boost the Wizard’s repertoire based on what spells are inside. Since Grimoires are different, players are free to pick and choose which they wish to use.
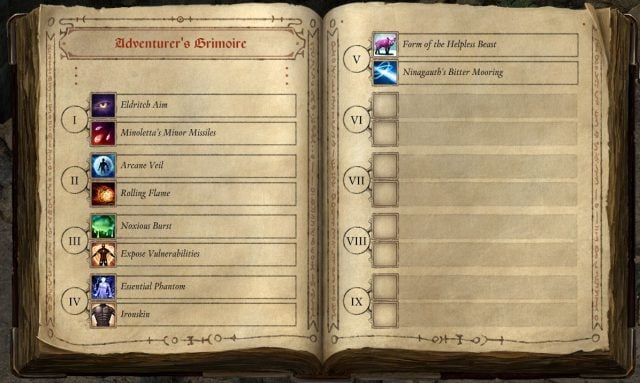
Conjurers specialize in Conjuration spells and gain +1 Power Level, along with -20% Recovery Time with them. They can also conjure a Familiar that boosts their Constitution, Power Level and Deflection. They lose access to Evocation and Illusion spells.
Enchanters specialize in Illusion spells and gain +1 Power Level, along with -20% Recovery Time with them. Once per encounter when struck with a Dexterity Affliction they clear it and gain immunity to further Dexterity Afflictions for a short Duration. This means they cannot be Paralyzed on the first attack. In exchange they lose access to Illusion and Transmutation spells.
Evokers specialize in Evocation spells and gain +1 Power Level, along with -20% Recovery Time with them. In addition, they have a chance to instantly recast any Evocation spell they use. In exchange they lose access to Transmutation and Conjuration.
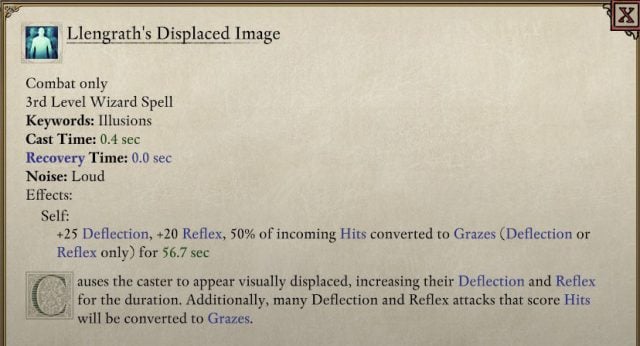
Illusionist specialize in Illusion spells and gain +1 Power Level, along with -20% Recovery Time with them. Once per encounter when struck they automatically cast Mirrored Image, boosting their Deflection. In exchange they lose access to Conjuration and Enchanting.
Transmuters specialize in Transmutation spells and gain +1 Power Level, along with -20% Recovery Time with them. Once per encounter they can change into a giant Orge, which disables spell casting, and readjusts the casters Attributes to be more like those of an Ogre. In exchange they lose access to Enchanting and Evocation spells.
Final Thoughts
This Guide is meant to be an overview of each Attribute, Race and Class to help you make decisions that you might have otherwise had difficulty doing. It is not an end all concrete guide. There are so many factors involved when it comes to creating the ideal character that there is almost no way to make it 100% perfect. This is probably the reason why there are so few guides out there, when it comes to Classes and Builds.
If you would like further information about each class, their Subclasses and how to Multiclass them effectively, please see our Class Guides. Obsidian has done a really great job of making nearly every combination of Classes viable, and many Builds can be theory crafted by looking over the Abilities of each class and seeing what synergizes well together. Moving forward we will be making a Combat Mechanics Guide, and perhaps a few other general Guides, but it is unlikely we will do very specific Builds for this reason.
What did you think of the Guide? Was it helpful? Leave your thoughts in the comments below.

 Aumaua
 Elf
Elf Godlike
 Dwarf
Dwarf Human
Human Orlan
Orlan


Log in to leave a Comment