Baldur’s Gate 3 Circle of the Moon Druid Build Guide – In this Baldur’s Gate 3 Circle of the Moon Druid Build Guide, I’m going to cover my Druid Build for Early Access, and show you what I’ve found to work best. I’ll be doing more Build Guides at the launch of Baldur’s Gate 3, but let’s look at how you can use a Circle of the Moon Druid effectively in the first Act of the game.
Be sure to check out our other Baldur’s Gate 3 Builds for Early Access including: Wild Magic Sorcerer, Wildheart Barbarian, Draconic Sorcerer, Berserker Barbarian, College of Lore Bard, College of Valour Bard, Oath of Devotion Paladin, Oath of the Ancients Paladin, Oathbreaker Paladin!
Best Druid Builds Features
- Abilities: Wisdom, Constitution
- Subclasses: Circle of the Moon & Circle of the Land
- Unique Feature: Wild Shape
- Spells: Divine Spells
- Hit Die: +5 HP + CON Modifier per level
Baldur’s Gate 3 Circle of the Moon Druid Build Guide
The Circle of the Moon Druid not only gains a lot of powerful Spells but also specializes in taking the shape of different creatures via their Wild Shape Class Feature. Wild Shape is what sets them apart even from their Circle of the Land counterpart since they can trigger this as a Bonus Action. Currently, they’re able to change into the Badger, Spider, Dire Wolf, Cat, Polar Bear, Deep Rothe, Dire Raven, and Aberrant Shape Intellect Devourer, but more are expected upon the full release of the game.
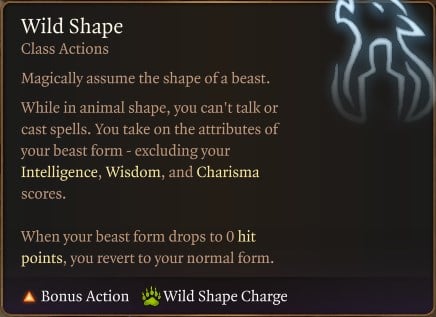
Each of these animals has its own Hit Points, Abilities, and Attacks, as well as various Features that allow the Druid to do much more. For example, the Badger can burrow underground, letting him go under obstacles that might be in his way. Or the Raven flies great distances, making it possible to reach places he wouldn’t otherwise be able to but note that they’ll encounter a carry weight issue given that they’re tiny compared to the other creatures. Because these things are extremely powerful, the Circle of the Moon Druid can only use Wild Shape 2 times even at Level 5 before needing a Short Rest to recover this ability.
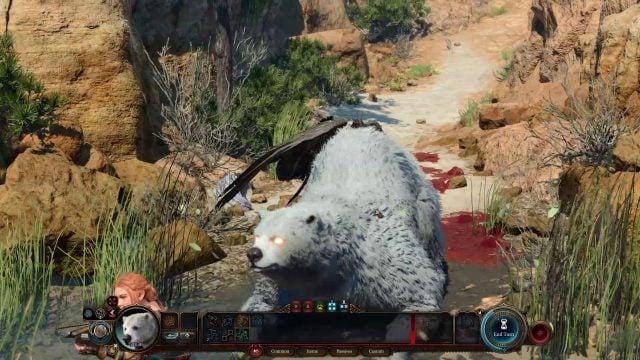
Shapeshifting gives you a separate health pool for that creature, completely independent of the Druid’s health pool before it transformed. And when that health pool is depleted, they simply change back into their human form with the same health they had before using Wild Shape. As such, Circle of the Moon Druids who use Wild Shape in combat is extremely durable, since they essentially have 2 health pools.
Baldur’s Gate 3 Circle of the Moon Druid Character Creation
In this section, we’ll take a look at how to set up your Druid during Character Creation for the best results. You don’t have to follow this to the letter, and this will likely change at the full launch of the game. However, this will hold you in good stead during Early Access.
Background
For Background, I suggest taking any that provides you with Wisdom Skills since Druids need a good amount of this Ability to hit targets with their Spells. These are Animal Handling, Insight, Medicine, Perception, and Survival. Ideally, you’d have all 5 of these but you’re more likely to get 3 out of 5 with Acolyte, Folk Hero, or Outlander.
Race
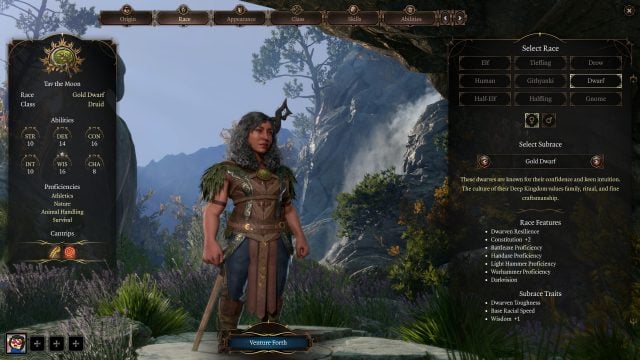
The first Race that works well for the Druid is Gold Dwarf. Not only does it provide +1 Wisdom, which allows you to get to 16 Wisdom during Character Creation, but it also gives you +2 Constitution, which increases your HP when not using Wild Shape, and allows you to pass Concentration checks more easily should you get hit while Concentrating on a Spell. Moreover, you gain Dwarven Toughness that raises your max HP every time you level up.
Wood Elf is also a decent choice because it grants +2 Dexterity and +1 Wisdom, which helps with Armour Class (AC) when not using Wild Shape, and still allows you to get to 16 Wisdom during Character Creation. Last but not least is Human, which lets you get to 16 in Wisdom, Dexterity, and Constitution if you want, though you’ll have to dump the other 3 Abilities.
Note that while using Wild Shape your Strength, Dexterity, and Constitution Modifiers will be replaced by those of the creature you shift into, though you’ll retain your Intelligence, Wisdom, and Charisma Modifiers. For this reason, Strength is not needed for the Druid in Early Access. However, because you cannot cast Spells while shifted, you’ll benefit from Dexterity and Constitution when you’re not.
Skills
For Skills again it’s not super important, but you’ll have high Dexterity and Wisdom, so selecting Skills that fall under these Abilities is ideal. Dexterity has Acrobatics, Sleight of Hand, and Stealth, and I’ve already listed what Wisdom Skills there are.
Abilities
Your primary Ability as a Druid is Wisdom, as this makes your Spells more effective in combat, and can even increase the damage you deal in melee combat if you use the Shillelagh Cantrip. For this reason, you’ll want at least 16 in this Ability during Character Creation, and likely 18 later on.
Constitution and Dexterity are really the only other Abilities that matter, but they have no effect when you’ve shifted, so they aren’t as useful as they could be. Because of this, you’ll only need to get them to at least 14 each. Note that Medium Armor only allows a bonus of +2 Dexterity, so you don’t need more than 14 Dexterity. You can dump Intelligence, Charisma, and Strength if you want, but you won’t be able to use the best Medium Armor in Early Access if you have less than 10 Strength. Your Ability Spread should look something like this:

Baldur’s Gate 3 Circle of the Moon Druid Level 1
During Character Creation you’ll be given Cantrips and Spells to choose from. But unlike Wizards, you won’t have to “Prepare” Spells from a Known Spell List to use them. Instead, you learn a limited number of Spells, which are readily available. As such, you must be very selective about the ones you intend to learn since Druids don’t have access to ALL of their Spells.
Cantrips
Here are good Cantrips the Druid should prioritize at Level 1:
 Thorn Whip deals damage and pulls enemies toward you. This is great for fights that include elevation, as it allows the Druid to pull targets down from below, thereby removing their Advantage. When they fall, it can even damage or kill them outright.
 Shillelagh buffs the Druid’s Staff or Club where the Damage Roll of either Weapon changes to 1d8 Bludgeoning Damage plus your Wisdom Modifier. Not only that but you’ll be using this same Ability Modifier for your Attack Rolls instead of Strength. Druids do melee sometimes, so it’s nice to have. It doesn’t require Concentration, so you should have Shillelagh active constantly.
Concentration
Some Cantrips and Spells have effects that are dependent on the Druid’s Concentration to remain active. Concentration is broken if you cast another Cantrip or Spell that also requires Concentration. You can tell which these are because it will say so on the Spell itself. For example, if you cast Faerie Fire, but then you cast Entangle, you would stop “Concentrating” on Faerie Fire and begin Concentrating on Entangle.

Moreover, if you take damage while Concentrating on a Spell, you must make a Constitution Saving Throw, and if you fail, then the effect of that Spell ends. Should you succeed in your Saving Throw, you maintain your Concentration and the Spell continues. This is why it’s vital for Druids to have average to high Constitution because of the Spells that require this Ability and is wasted if it’s constantly broken.
Spells
Druids have a wide variety of Spells that differ from other Spellcasting Classes. A couple of Level 1 Spells I highly recommend are Entangle, Thunderwave, Fairie Fire, and Healing Word.
 Entangle allows you to crowd control a group of enemies in an area if they fail a Strength Check. This can be great in fights where you’re outnumbered, or you need to cover your flank.
 Thunderwave is an excellent AoE that can knock enemies backward, often to their deaths, but has a short range. Use this when enemies get near you. However, remember that allies can also be harmed if they’re nearby so carefully position Thunderwave’s cast.
 Fairie Fire is an AoE that gives you and your party Advantage on all Attack Rolls versus affected targets but requires Concentration to maintain. This can seriously change the direction of battle as long as you can maintain it.
 Healing Word can revive fallen teammates and heal them from a distance. What’s particularly good about this, is that it’s a Bonus Action so you can still attack or cast another Spell.
Baldur’s Gate 3 Circle of the Moon Druid Level 2
For this Build, we’re going to choose Circle of the Moon, which heavily focuses on the Wild Shape Ability since they can use it as Bonus Action in combat. As a result, they can transform, move, and attack all in the same turn, something Circle of the Land Druids cannot do. Because resting is not an issue in Early Access, players can simply take a Short Rest to replenish their Wild Shape Charge.
Moreover, Circle of the Moon Druids can change into the Polar Bear, which has the highest health pool at 30, letting them tank many hits without dying. They can even Goad enemies into attacking them, making this Druid a great tank for the group. So if you’re going to use Wild Shape in combat, Polar Bear is the way to go. On top of this, Circle of the Moon Druids can consume a Spell Slot to heal themselves while transformed thanks to Lunar Mend, allowing them to stay shifted longer. The amount of healing gained is equal to d8 per Spell Slot level.

Another reason this Subclass excels in Early Access is that even if you can’t cast Spells while Wild Shape is active, you can certainly maintain Concentration. So you’re able to cast a Concentration Spell like Faerie Fire and then trigger Wild Shape to turn into a Polar Bear to momentarily serve as a tank for the party. Moreover, while you’re in this state, you can continue dealing heavy damage without risking breaking the Concentration you’re trying to maintain!
Spell
At Level 2, you also get to pick 1 Level 1 Spell, and for this, I recommend choosing Goodberry. Goodberry can provide a near-infinite amount of consumable healing items, which is very useful. Other friendlies are able to make use of it as well, allowing you to provide healing for the group.

Baldur’s Gate 3 Druid Level 3
At Level 3, you’ll gain another Level 1 Spell Slot and access to Level 2 Druid Spells. There are a lot of great Spells here but I highly recommend Moonbeam, Heat Metal, and Spike Growth.
 Moonbeam hits for 2-20 Radiant Damage in a small AoE that persists on the ground after it’s cast, dealing damage every round. And what’s really great about this, is that you can spend an Action to move its AoE up to 18m. So you only need to cast Moonbeam once per combat while conserving valuable Spell Slots.
 Heat Metal allows you to deal 2-16 Fire Damage to a target that is wielding a metal Weapon or Armor. They’ll either let go of this Weapon or incur Disadvantage on Attack Rolls and Ability Checks until the next turn. That’s all on top of being able to cast it again as a Bonus Action on the target, provided they’re still touching the metal item, thereby dealing damage and reapplying Disadvantage. In short, this is a great Spell to lock down tough enemies.
 Spike Growth allows you to control a large space of the battlefield with thorns that slow creatures down and damage them if they try to move through it. This is an excellent way to keep enemy melee units from getting to your friendlies and can be invaluable when you’re outnumbered.
Once you reach Level 3, you’ll also be able to cast some Level 1 Spells as Level 2 versions, using Level 2 Spell Slots instead of Level 1 Spell Slots. This works out tremendously for the Circle of the Moon Druid Build because it lets you cast some of the better Level 1 Spells as more powerful versions. For instance, you can cast Thunderwave at Level 2 for an extra 1-8 damage.
Baldur’s Gate 3 Druid Level 4
At Level 4, you can choose a Feat, and here you’ll be taking Ability Improvement to place 2 points into Wisdom to get to 18. As a Druid, you simply cannot have enough Wisdom, so this is the obvious choice.

You’ll also gain another Level 2 Spell Slot, as well as a Cantrip. You can pick the Level 2 Spell you didn’t choose in the previous level or go with Flaming Sphere. Flaming Sphere is a good Spell because, in addition to casting this from afar, you can initiate combat thanks to the sphere you conjure. As such, you deal 2-12 Fire Damage to nearby enemies while acting as an additional light source in dark areas. Furthermore, the sphere can’t be damaged and as long as you maintain Concentration, you’ll be able to consistently attack them with it for a total of 10 turns. Additionally, you won’t opt for Flame Blade since you’re going to spend most of your time in Wild Shape form.
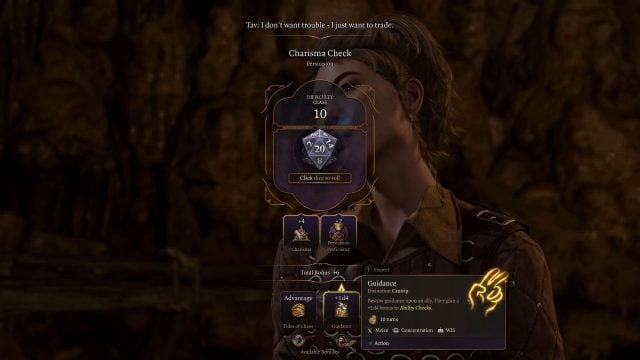
For the Cantrip, I suggest selecting Guidance to gain a d4 bonus on Ability Checks, which will come in handy in dialogues. This doesn’t only benefit you but your allies as well.
Baldur’s Gate 3 Druid Level 5
At Level 5, you gain 2 Level 3 Spells, and here I suggest taking Call Lightning and Sleet Storm.
 Call Lightning is a powerful Spell that lets you deal 3-30 Lightning Damage. As long as you maintain Concentration, you can recast this in succeeding turns by simply spending an Action to trigger Activate Call Lightning.
 Sleet Storm is an incredible crowd control Spell because it creates an icy surface, which lowers the Movement Speed of affected targets while potentially knocking them Prone. What’s more is that it can meddle with the Concentration of Spellcasters to stop the effects of their Spells so you’ll definitely want to use this against Druid, Wizard, and Cleric enemies.
Equipment
Equipment is less useful to the Circle of the Moon Druid who remains shifted for long periods of time, however, it can be very helpful in combat situations where they’re casting Spells. Since they have decent Dexterity they’ll want to have a Ranged Weapon of some type, as well as a Club or Quartstaff that they can buff with Shillelagh. Either Weapon can be wielded since you can equip a Shield in your offhand, thereby increasing your AC by +2 for a total of 19.
Druids can wear Medium Armor, and while this won’t matter while Wild Shape is active, it’ll be useful when they’re not. Currently, the best Medium Armor is either Lae’zel’s Githyanki Half Plate or Scale Mail +1. You need at least 10 Strength to use these, so make sure to have it!

When it comes to Accessories, the Absolute’s Talisman works well for this Build because Circle of the Moon Druids will likely be in combat often while using Wild Shape. This allows them to maintain their Wild Shape form, and keep on fighting, without having to stop to heal. The necklace can be found in the Shattered Sanctum.
Final Tips
As a Circle of the Moon Druid, you’re not confined to always transforming into a Polar Bear in combat since there are a lot of other available choices. You can turn into a Spider to trap enemies in place or a Deep Rothe to charge at and knock them Prone. This Subclass encourages you to think outside the box so don’t be afraid to experiment with its features. Moreover, you cannot cast Spells while Wild Shape is in effect so you need to be sure to cast them beforehand, followed by shifting because it’s a Bonus Action. Your Spells will be just as strong as Circle of the Land Druids in Early Access.
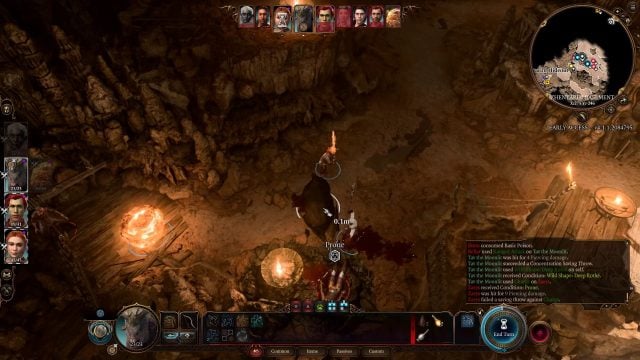
Remember that your Strength, Dexterity, and Constitution become that of the creature you change into, but your Intelligence, Wisdom, and Charisma do not. For this reason, it might be a good idea to pump Wisdom, Intelligence, and Charisma for better Saving Throws while in combat, as well as Skill Checks outside of it. There is a lot of flexibility to the Druid, so play around with what you like.
Be sure to plan your party around the Circle of the Moon Druid. As a Polar Bear tank, you might want to swap out Shadowheart or Lae’zel. Plan accordingly so that you have a good party composition. Furthermore, you can substitute any of your Level 2 Spells for Lesser Restoration to help support your allies better, especially if they keep taking status effects. It doesn’t require Concentration, simply an Action. So after casting this, you can transform into a Polar Bear.
Stay tuned for more Baldur’s Gate 3 content as we update the other Builds, and be sure to drop by our Twitch Channel if you have questions about the game. If you need something specific, check out our Baldur’s Gate 3 Wiki which is being worked on night and day!


Log in to leave a Comment